Authentic Korean Food Recipe: How to Make 계란말이 김밥 (Egg-rolled Gimbap)
🍳 Today calls for Bongcheon-dong Style! Diving into the Charm of Fluffy Egg-Rolled Gimbap. Hello everyone!
🍳 Today calls for Bongcheon-dong Style! Diving into the Charm of Fluffy Egg-Rolled Gimbap.
Hello everyone! The weather has gotten noticeably warmer these past few days, hasn't it? It makes my heart flutter a bit. Yesterday, I suddenly remembered that famous egg-rolled gimbap my friends and I used to line up for in Bongcheon-dong back in my college days. The combination of that distinct nutty aroma and the soft egg coating... just thinking about it made my mouth water, so I immediately put on my apron this morning!
Honestly, gimbap can seem like a lot of work, which makes people hesitate. But this egg-rolled gimbap actually requires simpler ingredient prep than regular gimbap, yet the visuals are much fancier, making it perfect for inviting guests or packing picnic lunches. That taste that makes you instantly say, "Wow, this is really delicious!"—I'm going to share all the honey tips I've personally learned right now. Stay with me until the end!

🛒 Ingredients Preparation (Based on 2 servings)
Shall we carefully check the ingredients first? This menu is great for cleaning out the fridge, but for the best flavor balance, I recommend preparing these specific ingredients!
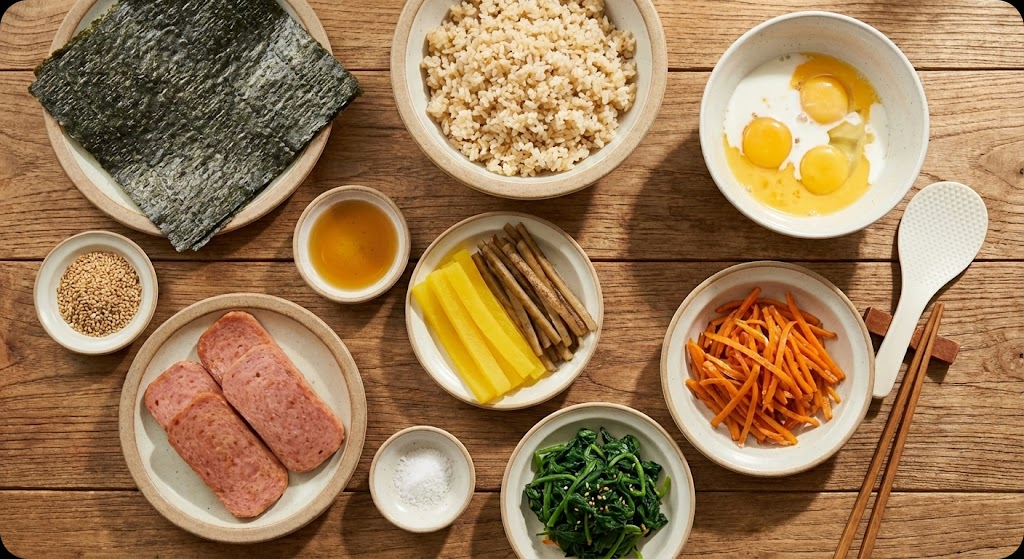
- Essential Ingredients: 2 bowls of cooked rice, 2 sheets of gimbap seaweed (nori), 4-5 eggs, Spam (or sausage), 2 strips of danmuji (pickled radish), 2 strips of braised burdock root, spinach (or cucumber)
- Rice Seasoning: 1 tablespoon sesame oil, 1 tablespoon sesame seeds, 2-3 pinches of salt
- Optional Ingredients: Stir-fried julienned carrots, crab sticks (imitation crab), pickled vegetables (jangajji - highly recommended as a side!)
💡 Chef's Tip: You should prepare plenty of eggs, about 5 large ones, to fully wrap the gimbap. Also, if you add a piece of kelp (dashima) when cooking the rice, the grains become much glossier and tastier. Preparing the fillings slightly saltier than for regular gimbap makes the seasoning perfect when it meets the egg layer!
👩🍳 The Cooking Process
Alright, shall we start cooking with excitement? It requires a slightly more delicate process than regular gimbap, but if you follow the steps I'm about to share one by one, anyone can master it!
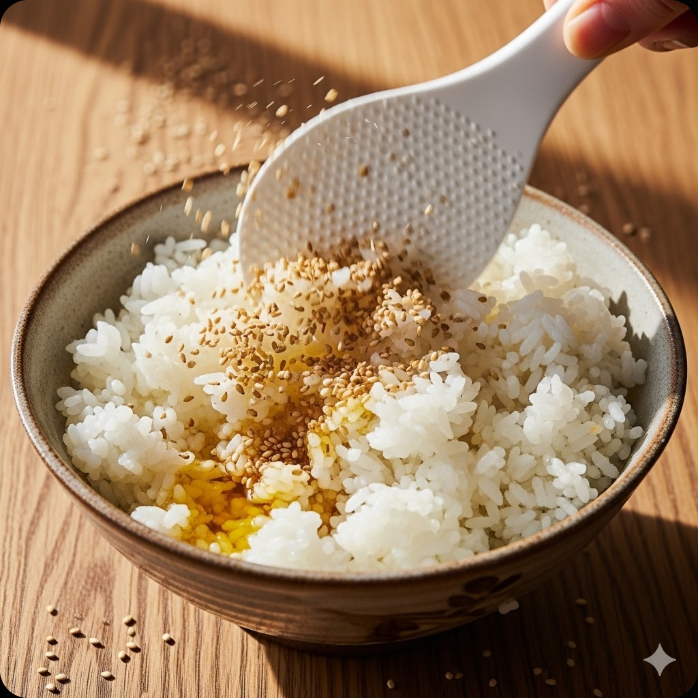
Step 1: Seasoning the Fluffy Rice
First, add the sesame oil, sesame seeds, and salt to warm rice and mix well. The key here is to use the rice paddle in a cutting motion, like drawing an 'X', so the rice grains don't get mashed. You must let it cool down a bit so the seaweed doesn't get soggy, allowing you to make a firm gimbap.
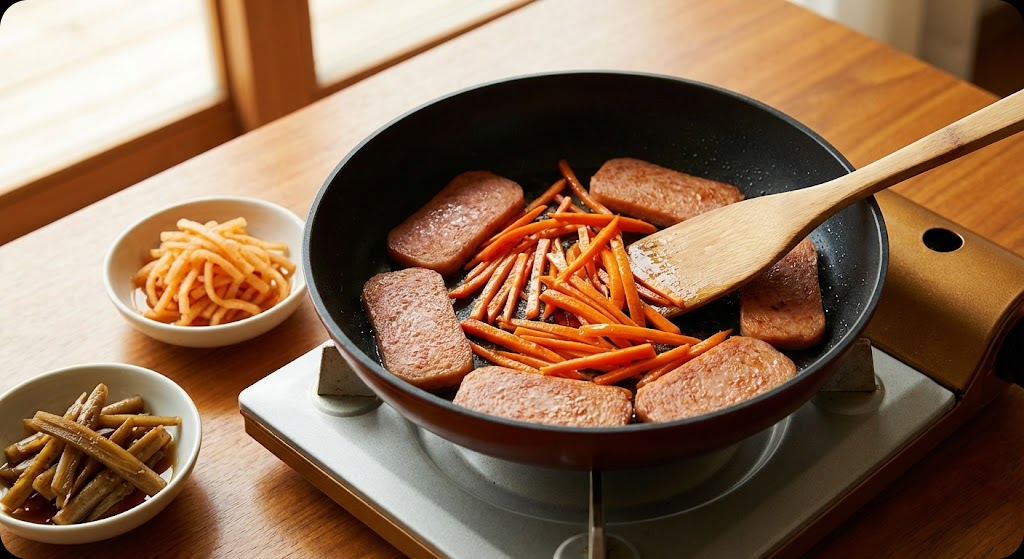
Step 2: Nicely Preparing the Fillings
Slice the Spam into long strips and fry until golden. Julienne the carrots and lightly stir-fry them with a pinch of salt. Squeeze all the water out of the danmuji and burdock root. For egg-rolled gimbap, if the fillings are too thick, it can be hard to roll, so try preparing them a little thinner than usual!

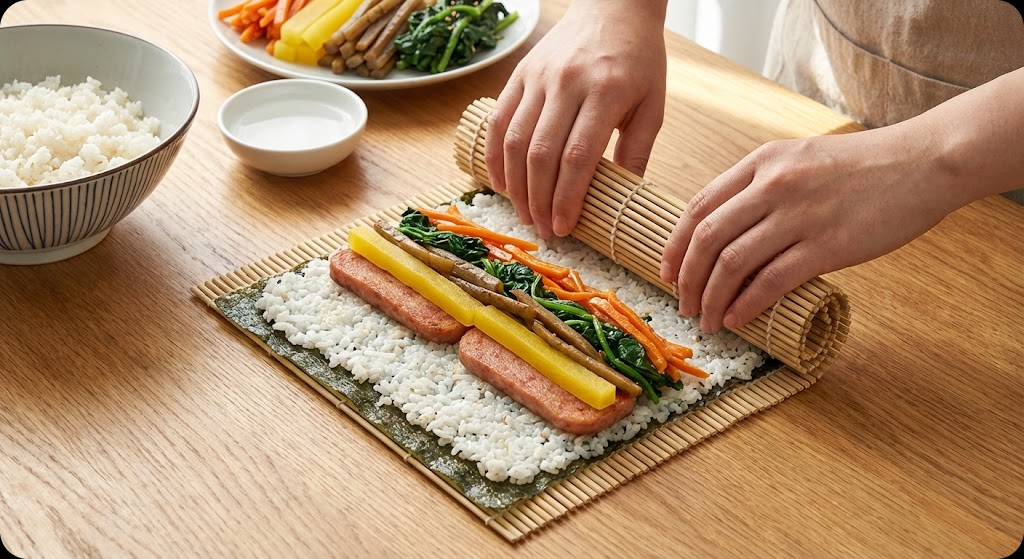
Step 3: Rolling the Gimbap Firmly
Place the seaweed with the rough side facing up, then spread the seasoned rice thinly and evenly. Stack the prepared fillings in the center and roll it up tightly. Applying a little water to the end edge helps the seaweed stick very well. Make a total of 2 rolls and set them aside for a moment.
Step 4: Making the Soft Egg Wash
Whisk 5 eggs and add a pinch of salt and a very small amount of sugar. Here's my secret tip! If you add 1 tablespoon of milk and 1 teaspoon of cooking wine (mirin), it removes the egg odor and makes the texture much fluffier. Strain it once through a sieve to remove the chalaza (alaza), and you'll get restaurant-quality visuals!
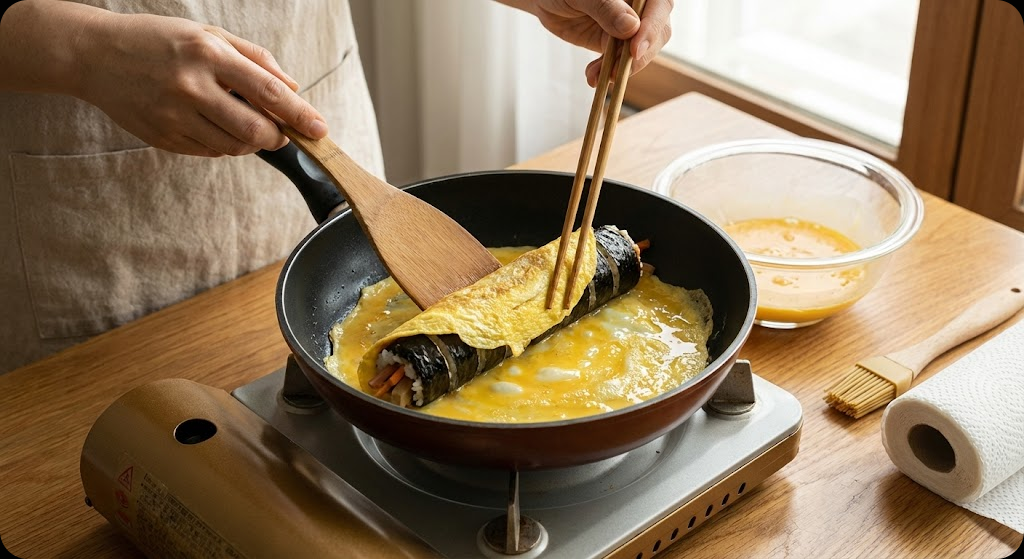
Step 5: The Care-Filled Egg Coating Process
Lightly drizzle cooking oil in a pan and wipe it with a paper towel to coat the surface. On low heat, spread the egg wash thinly. When the egg is about 70% cooked, place the pre-rolled gimbap on top. Slowly roll the gimbap to coat it with the egg layer. If the heat is too high, the egg will burn quickly, so don't forget to maintain 'low heat'!
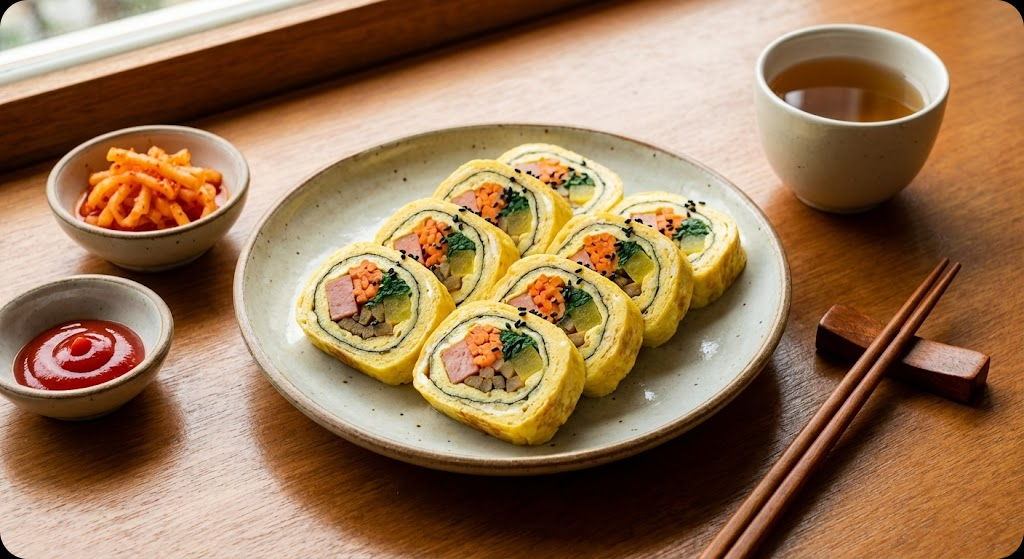
Step 6: Slicing Neatly to Finish
Do not slice the finished gimbap immediately; let it cool slightly on a plate first. This helps the egg layer adhere tightly to the gimbap so the shape doesn't fall apart when sliced. Lightly apply sesame oil to the knife blade and slice it into even thicknesses, and you're done!

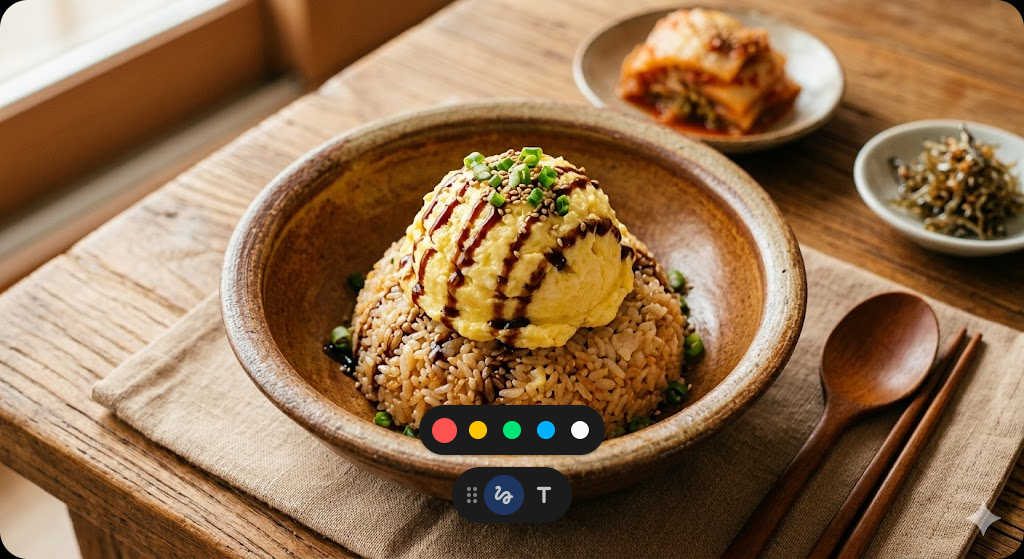
✨ Plating & How to Enjoy It More
The finished egg-rolled gimbap looks much neater when served on a wooden cutting board or warm-toned ceramic ware. Sprinkle some black sesame seeds on top for visual completion! I paired it with spicy pickled radish (mu-jangajji) today, and it's truly a divine move. The spicy, crunchy texture coming after the nutty egg taste cleanses the palate refreshingly.
If eating with children, a side of ketchup is good. For adult palates, I highly recommend dipping it in tteokbokki sauce! For drinks, warm barley tea or light sparkling water goes very well with it.
📝 Honest Review and Storage Tips
Although I made it myself, this egg-rolled gimbap was truly the golden ratio! The moment I took a bite, I thought, "This is it!" My husband also gave it a thumbs up, saying it was much tastier than store-bought versions. If you happen to have leftover gimbap, store it in an airtight container in the refrigerator. When eating it the next day, just warm it gently in the microwave for about 30 seconds. You can then enjoy that soft texture again, just like it was freshly made.
Egg-rolled gimbap allows you to fill your table nicely with just a spoonful of care, without needing any special ingredients! Definitely try making it for lunch this weekend. You will surely fall for its charm too! I'll be back next time with an even more delicious recipe! Bye! 😊