The Ultimate Korean Food Guide: Easy Kimchi Fried Rice (Kimchi-bokkeumbap) Recipe 🍳
No-Fail Golden Recipe! Making the Best Kimchi Fried Rice of Your Life 🍳✨Hello!
No-Fail Golden Recipe! Making the Best Kimchi Fried Rice of Your Life 🍳✨
Hello! Everyone, thank you for visiting my blog while wondering "What should I eat today?" 🥰 The weather has gotten quite chilly lately, hasn't it? At times like this, rather than a grand meal, I find myself craving a warm and spicy bowl of home-cooked food. Specifically, when there's nothing much in the fridge or when friends suddenly drop by, the dish I serve with the most confidence is the Kimchi Fried Rice I'm introducing today!
While Kimchi Fried Rice is a national dish that anyone can make, you know it's surprisingly tricky to make it "delicious," right? That savory, umami-explosive taste just like the ones from restaurants! Today, I’m going to generously share the golden ratio recipe I discovered after countless trials and errors. Even beginners can follow this and encounter the best Kimchi Fried Rice of their lives. It's truly delicious, so please try it! 😋
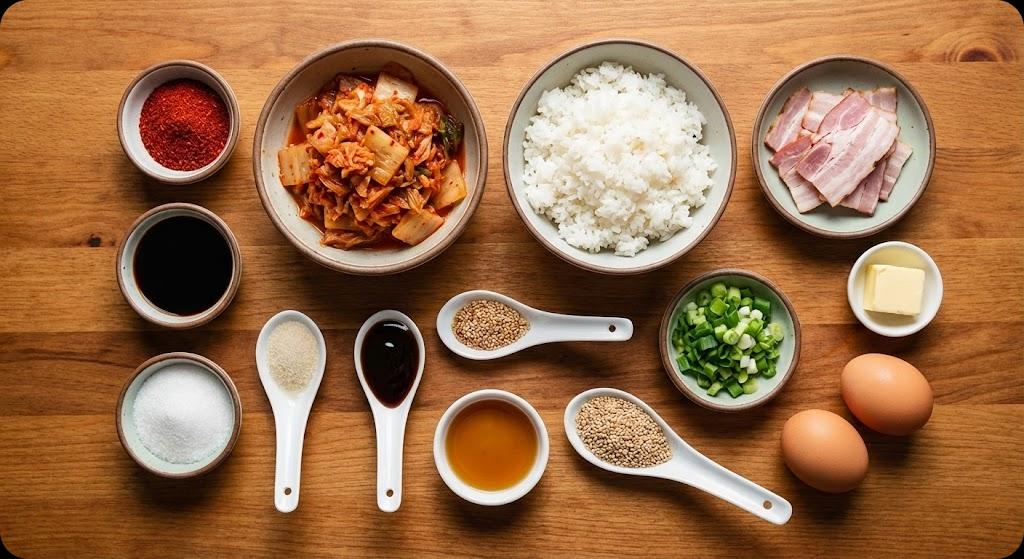
✅ Ingredients (Serves 2)
I’ve prepared ingredients that are as easy to find as possible. However, there are hidden tips that make a world of difference in taste, so please check them carefully! 📝
- Essential Ingredients: 1.5 cups well-ripened Kimchi (sour kimchi recommended), 2 cups cold rice, 4 slices bacon (or 1/2 can of Spam), 1 stalk green onion, 3 tablespoons cooking oil
- Seasoning Ingredients: 1 tablespoon gochugaru (Korean chili powder), 1 tablespoon soy sauce, 1/2 tablespoon sugar, 1/2 tablespoon oyster sauce (optional, but doubles the flavor!), 1 tablespoon sesame oil, plenty of roasted sesame seeds
- Cheat Code Ingredients: 1 pat unsalted butter (adds a huge flavor boost at the end!), 2 eggs
💡 Cooking Tip! It’s best to use sour (aged) kimchi. If your kimchi is too fresh, try mixing in about half a tablespoon of vinegar. Also, cold rice that has lost a bit of moisture works much better than freshly cooked rice for that perfect chewy texture!
👩🍳 Cooking Process (Just Follow Along!)
The keys to making Kimchi Fried Rice are heat control and the order of ingredients. I'll explain in detail across 6 steps!
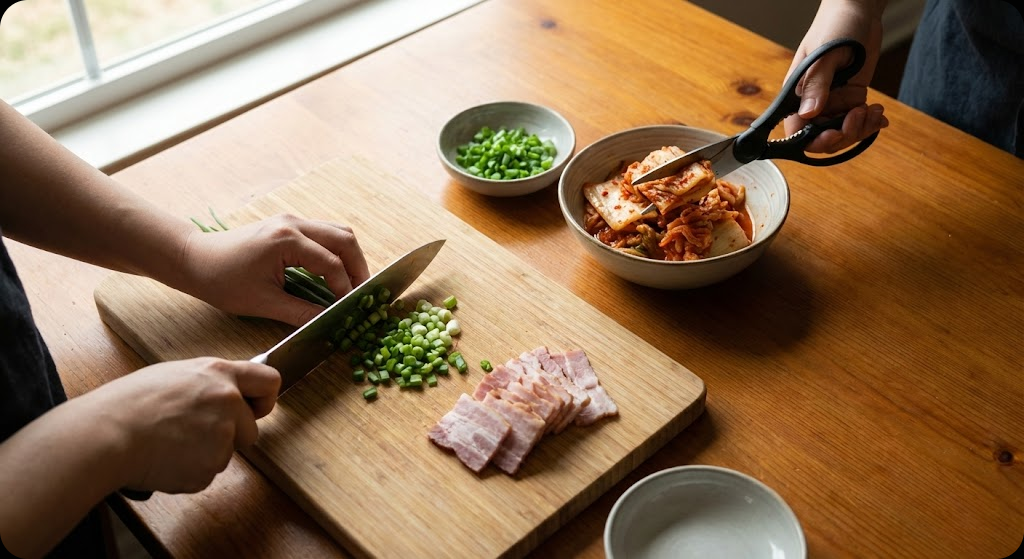
Step 1. Preparing the Ingredients
First, thinly slice the green onions to use for green onion oil. Cut the bacon (or Spam) into bite-sized pieces, and most importantly, finely chop the kimchi with scissors! If there is too much kimchi juice, the fried rice can become soggy, so the key is to squeeze out just a bit of the liquid before preparing. 👍
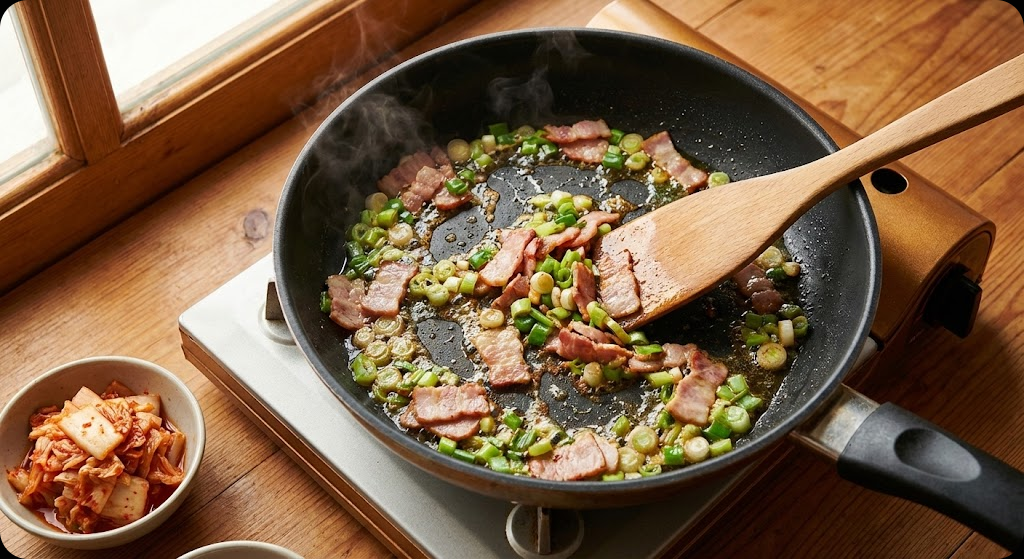
Step 2. Making Fragrant Green Onion Oil
Pour 3 tablespoons of cooking oil into a pan and add the sliced green onions first. It’s important to sauté them over medium heat until the fragrance of the onions rises. Creating a good green onion oil significantly elevates the overall quality of the dish. Once the onions start to turn slightly golden, add the bacon and cook until browned.
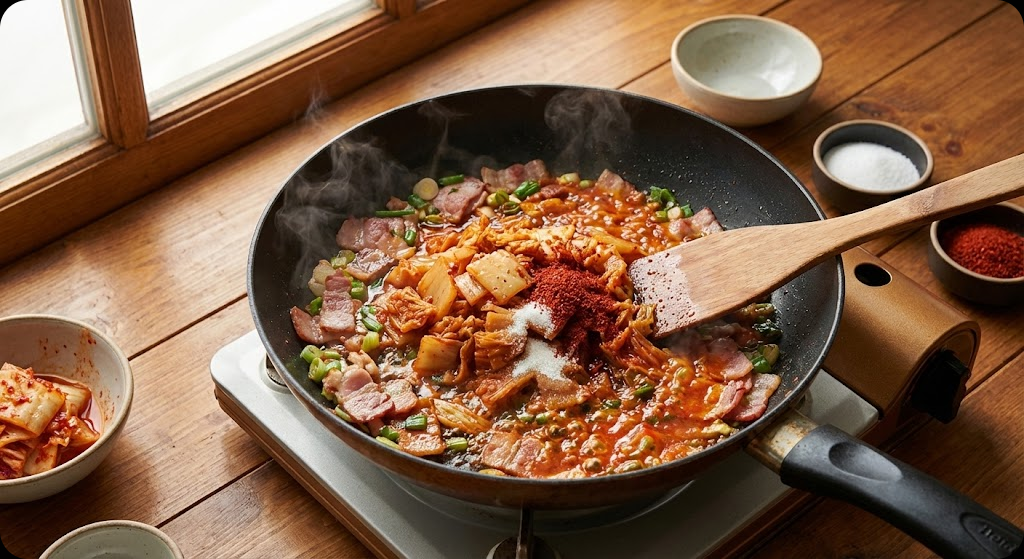
Step 3. The Harmony of Kimchi and Sugar
Now it's time to add the finely chopped kimchi! Adding 1/2 tablespoon of sugar at this stage will temper the strong acidity of the sour kimchi while bringing out the umami. Add 1 tablespoon of gochugaru now as well. As the chili powder absorbs the oil, it creates a chili oil effect that makes the color look much more appetizing. 🔥
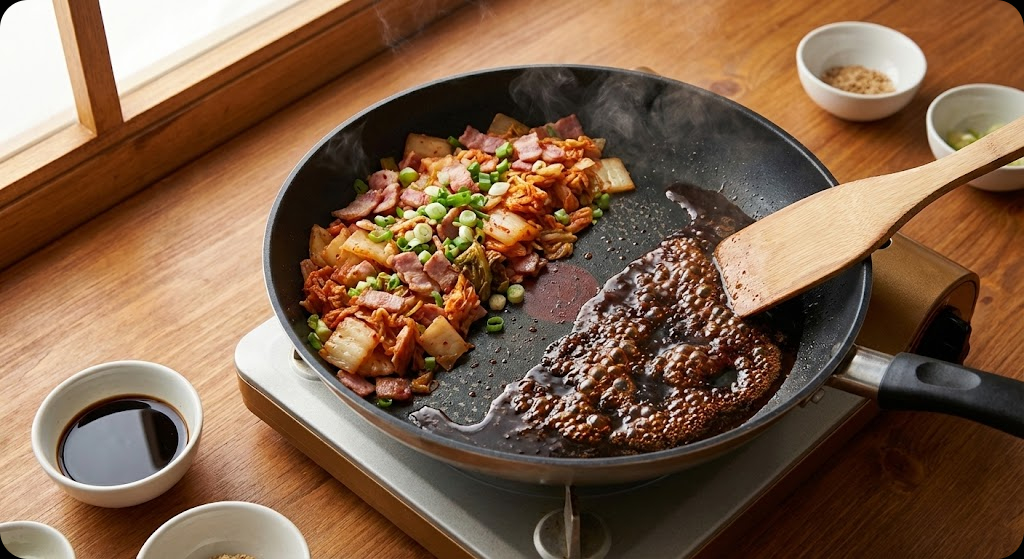
Step 4. Infusing "Smoky Flavor" with Soy Sauce
When the kimchi has cooked until somewhat translucent, push the ingredients to one side of the pan. Pour 1 tablespoon of soy sauce into the empty space and let it bubble. When the soy sauce starts to caramelize and its aroma rises, mix it with the other ingredients. This is the secret to that restaurant-style smoky flavor! If you add a bit of oyster sauce here, it’s game over.
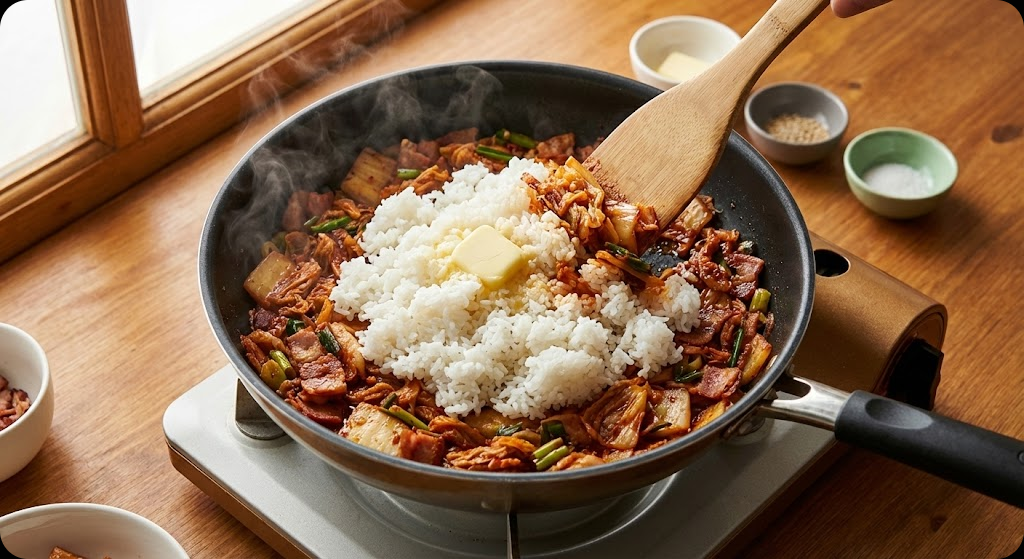
Step 5. Adding Rice and Sautéing
Now, turn the heat down to low or turn it off briefly and add 2 cups of cold rice. It’s important to use the spatula in a cutting motion to mix everything evenly so the rice doesn't clump. Once the rice and ingredients are well blended, turn the heat back to high and sauté for 1-2 minutes to cook off any excess moisture. Melting in a pat of butter at the very end will create an explosion of savory flavor! 🧈
Step 6. Topping with a Fried Egg
The finishing touch for any fried rice is a fried egg, right? Prepare it "sunny-side up" so the yolk can break over the rice. If you use plenty of oil on the edges of the pan and "fry" it, you'll get an egg that's crispy on the outside and soft on the inside.
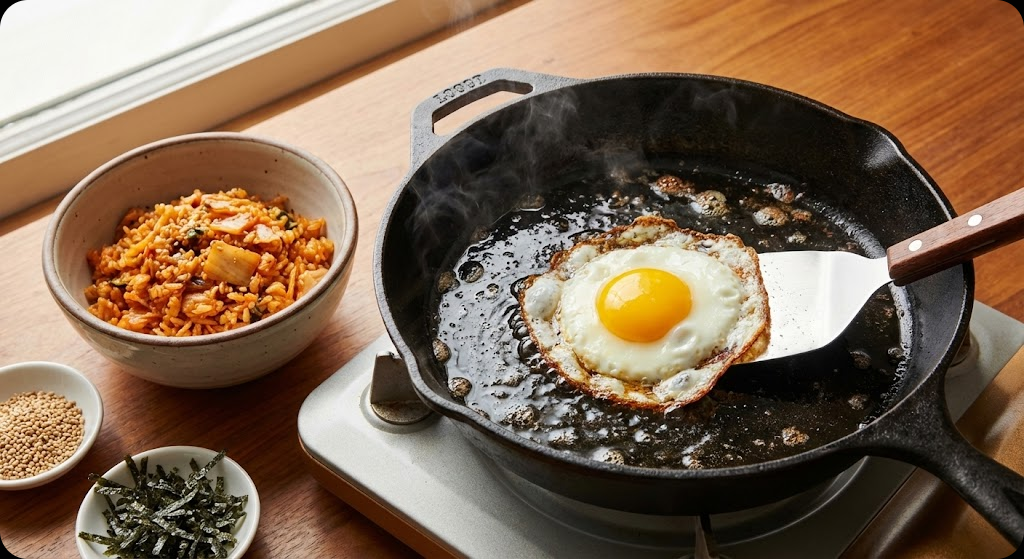
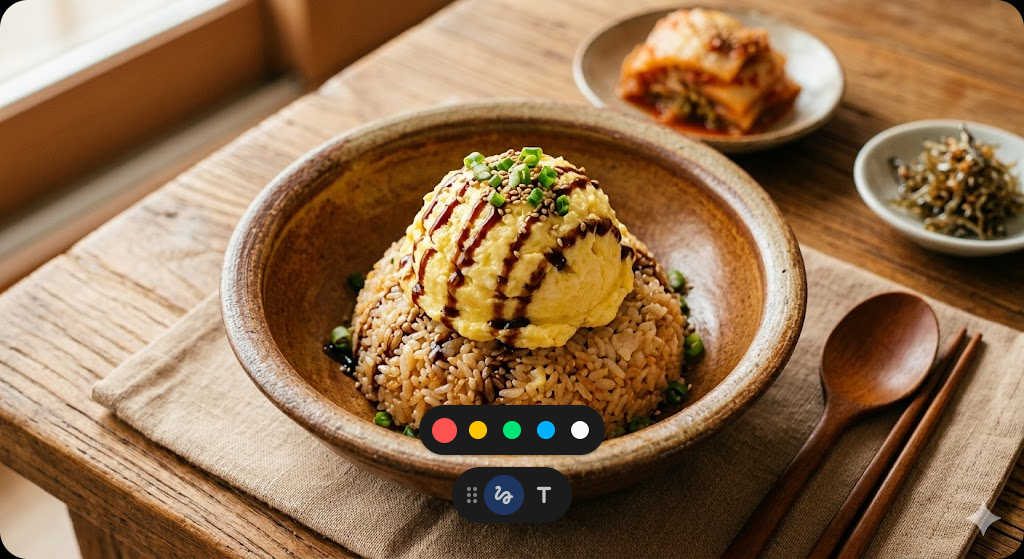
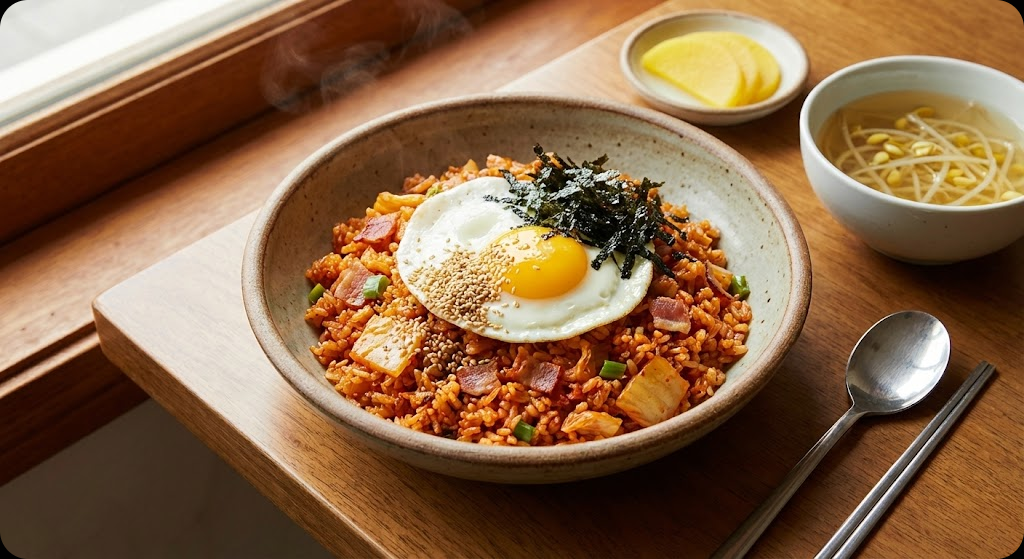
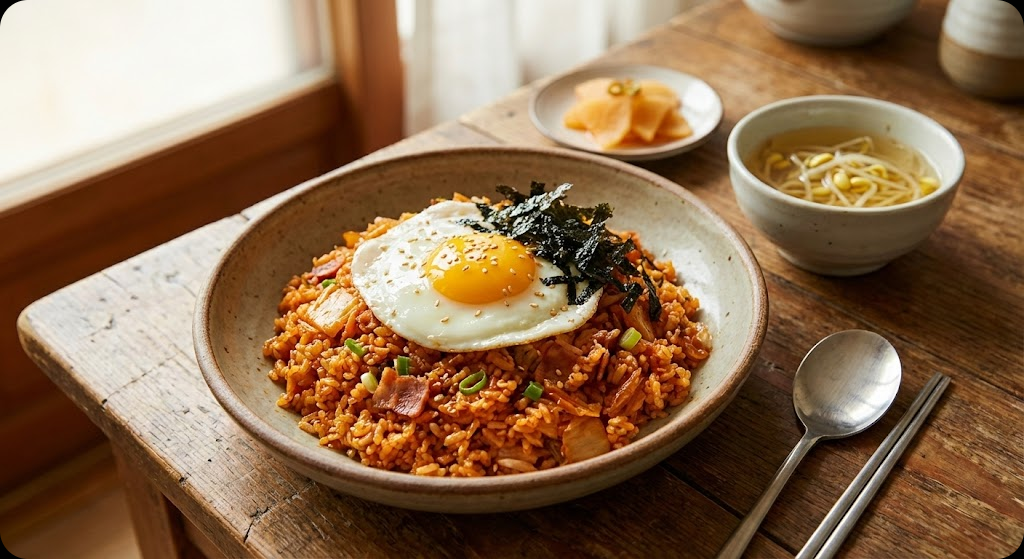
✨ Plating & Completion
Mound the Kimchi Fried Rice onto a pretty plate and top it with your carefully made fried egg. Finish by sprinkling some seaweed flakes and roasted sesame seeds! 😋 It looks beautiful in photos, and the smell alone screams "I'm delicious!"
For side dishes, I recommend a refreshing Bean Sprout Soup or crunchy Yellow Radish Pickles. Taking a bite of the spicy, salty fried rice followed by a sip of clean broth makes it infinitely eatable. A glass of sparkling water or a cold Coke also pairs perfectly!